
Homemade Volcano Eruption - Keeping Busy At Home
While we have been ticking a ton of crafts and activities off our must do list, there has been one that we’ve been waiting for the perfect time to carry out! The weather here in LA has been so gloomy and rainy, this week we finally felt some sun, and declared it perfect volcano weather! Last Sunday we set out to build our own volcano, equipped to erupt in our backyard! I will say building a volcano from scratch wasn’t easy at first. We had no poster board and limited cardboard, which are the things most online tutorials say you need. It took us nearly an hour and half, plus a roll of tape later to determine the best way to build our volcano wasn’t with paper or cardboard at all. It was with play dough!
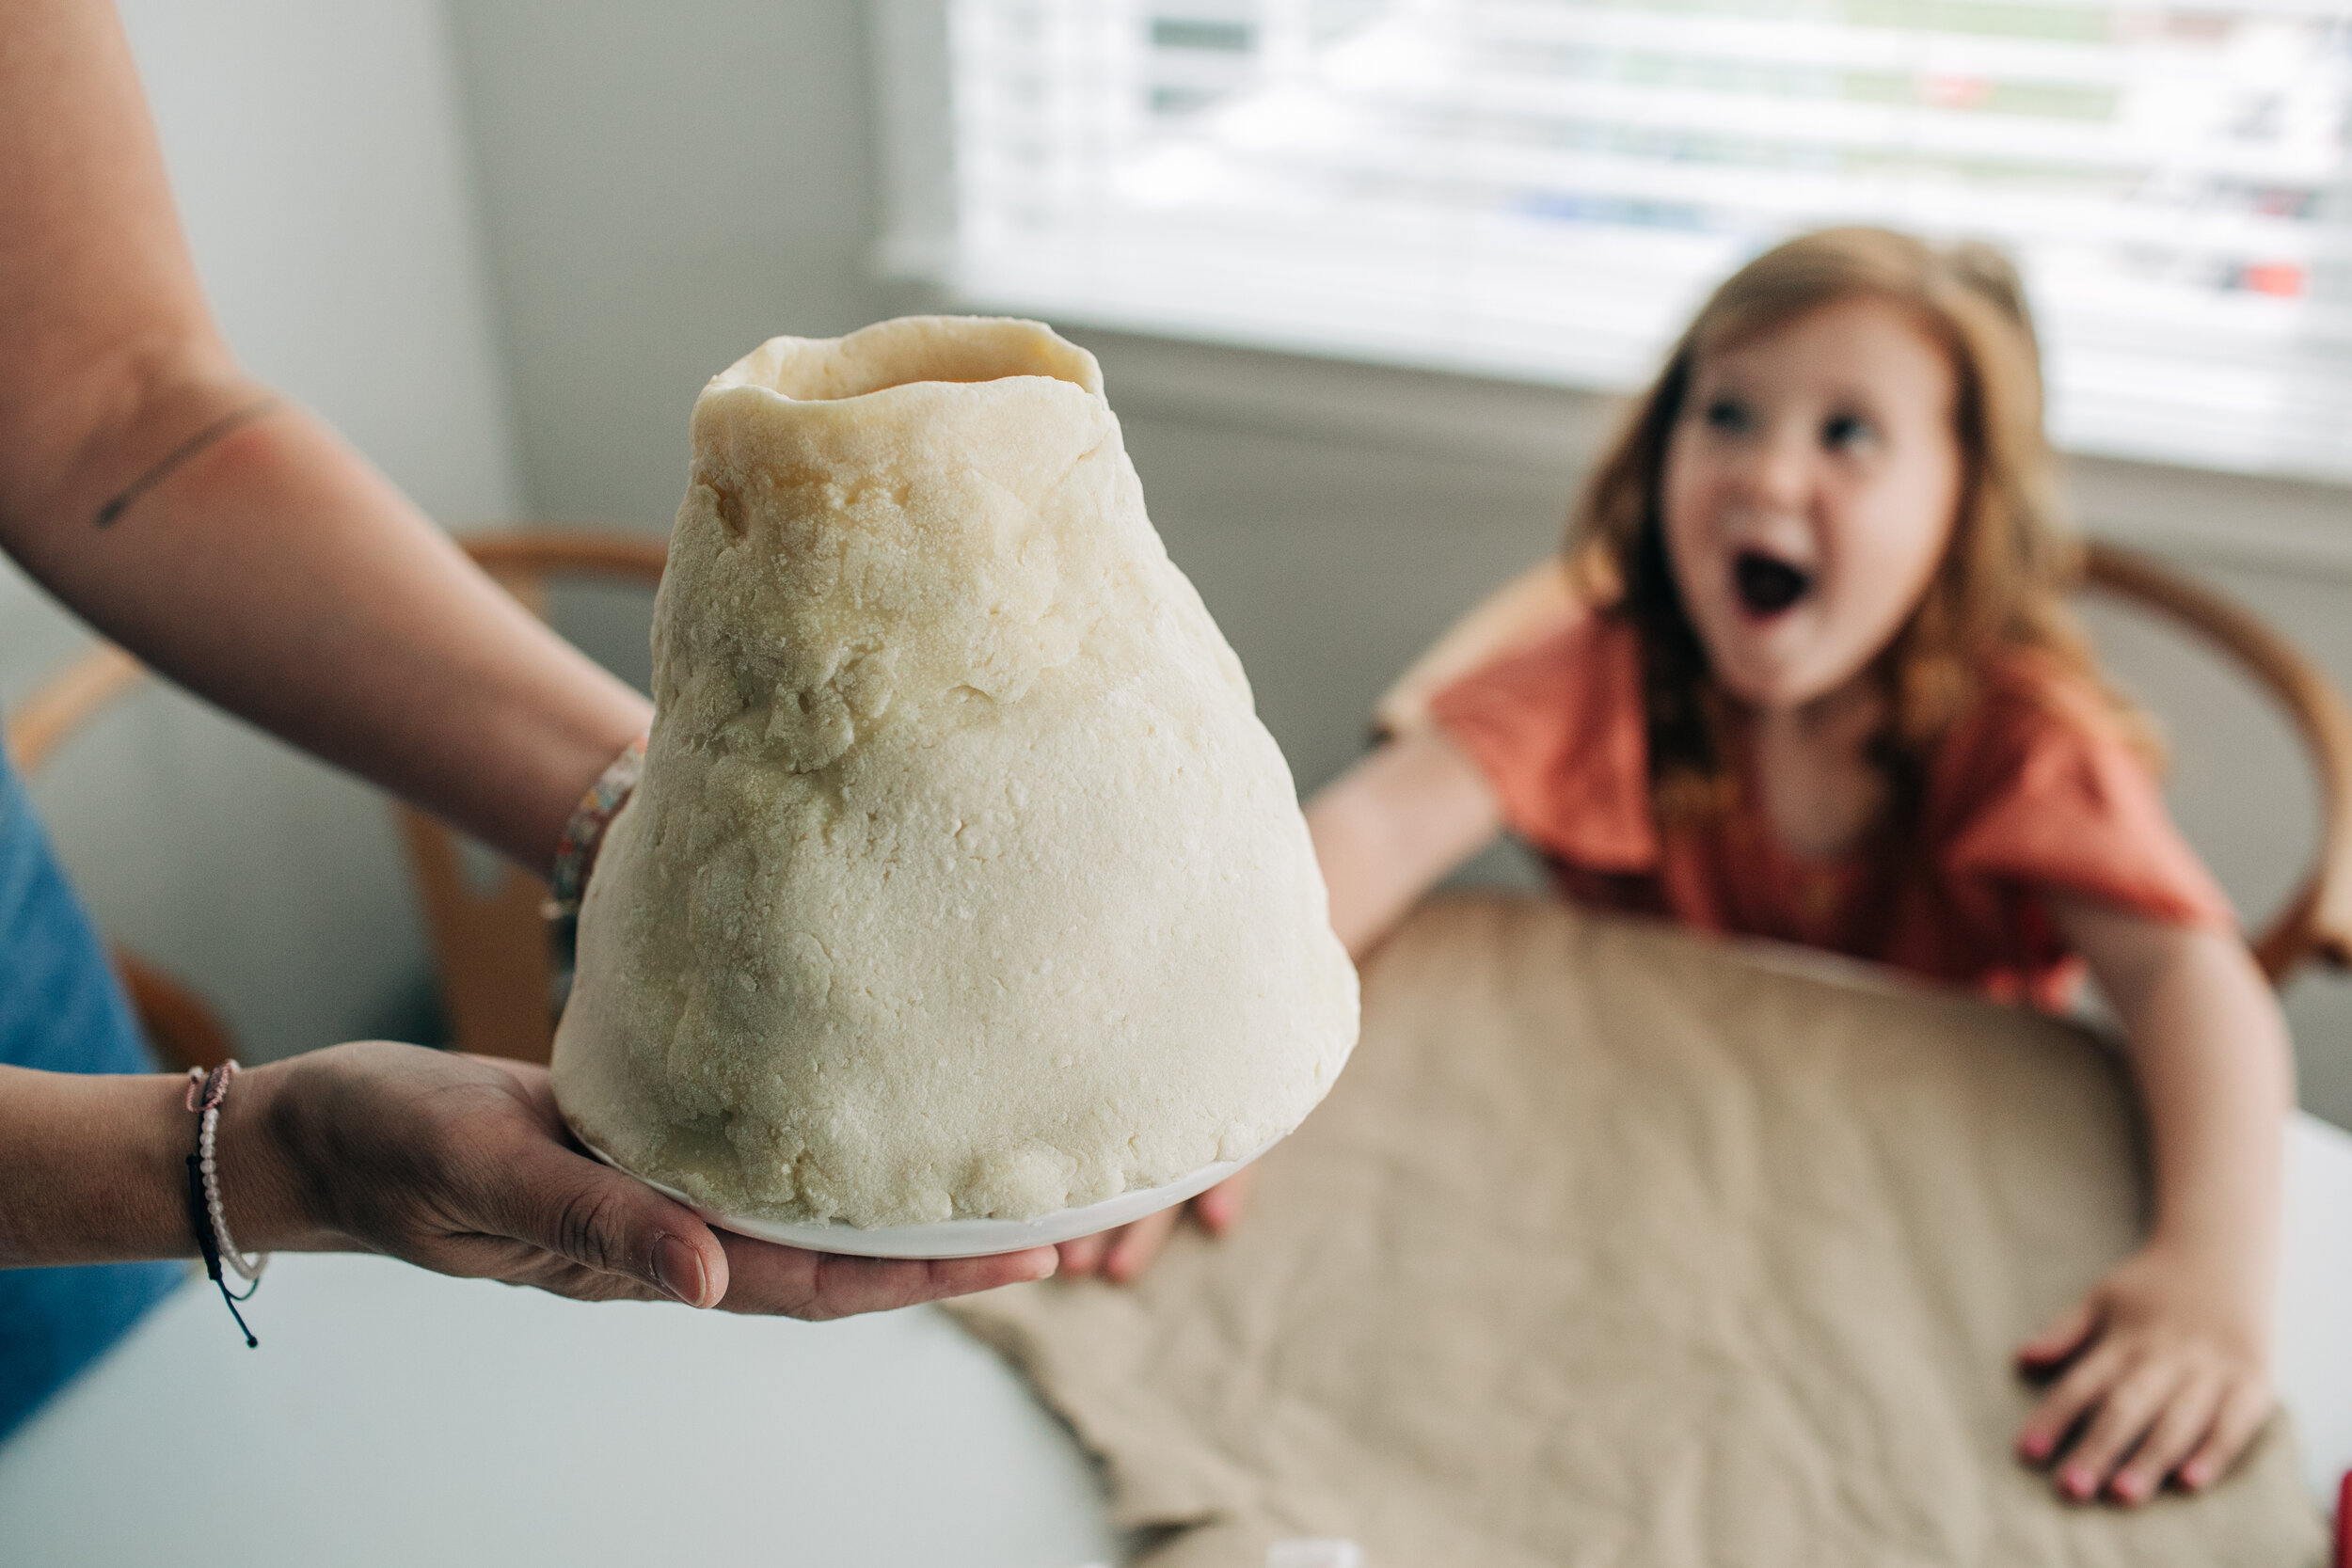
We used our Homemade Play Dough recipe (you can find that HERE), tissue paper, tape, a water bottle with the top cut off, and a small plate. Once we made our play dough, I placed the water bottle in the center of the plate and taped it in place. Then I scrunched tissue paper around the base and started adding my play dough to form a volcano shape. I rolled out large pieces of the play dough and kept layering them up around the tissue paper + water bottle. I dipped my finger in water to help smooth together all the play dough seams. Once I was happy with the shape we let it dry out on the counter until it was hard. That took two days.
I didn’t take any photos of me putting it together since I wasn’t sure what I was doing would work. But the end result turned our pretty rad! Plus, we can keep reusing it whenever we want to have a little volcano eruption action! I mean we can keep using it until the play dough falls apart. But building it this way definitely gives us a handful of eruptions. Below you can see what it looked like after it dried out, and I try to show you the inside where the water bottle is.

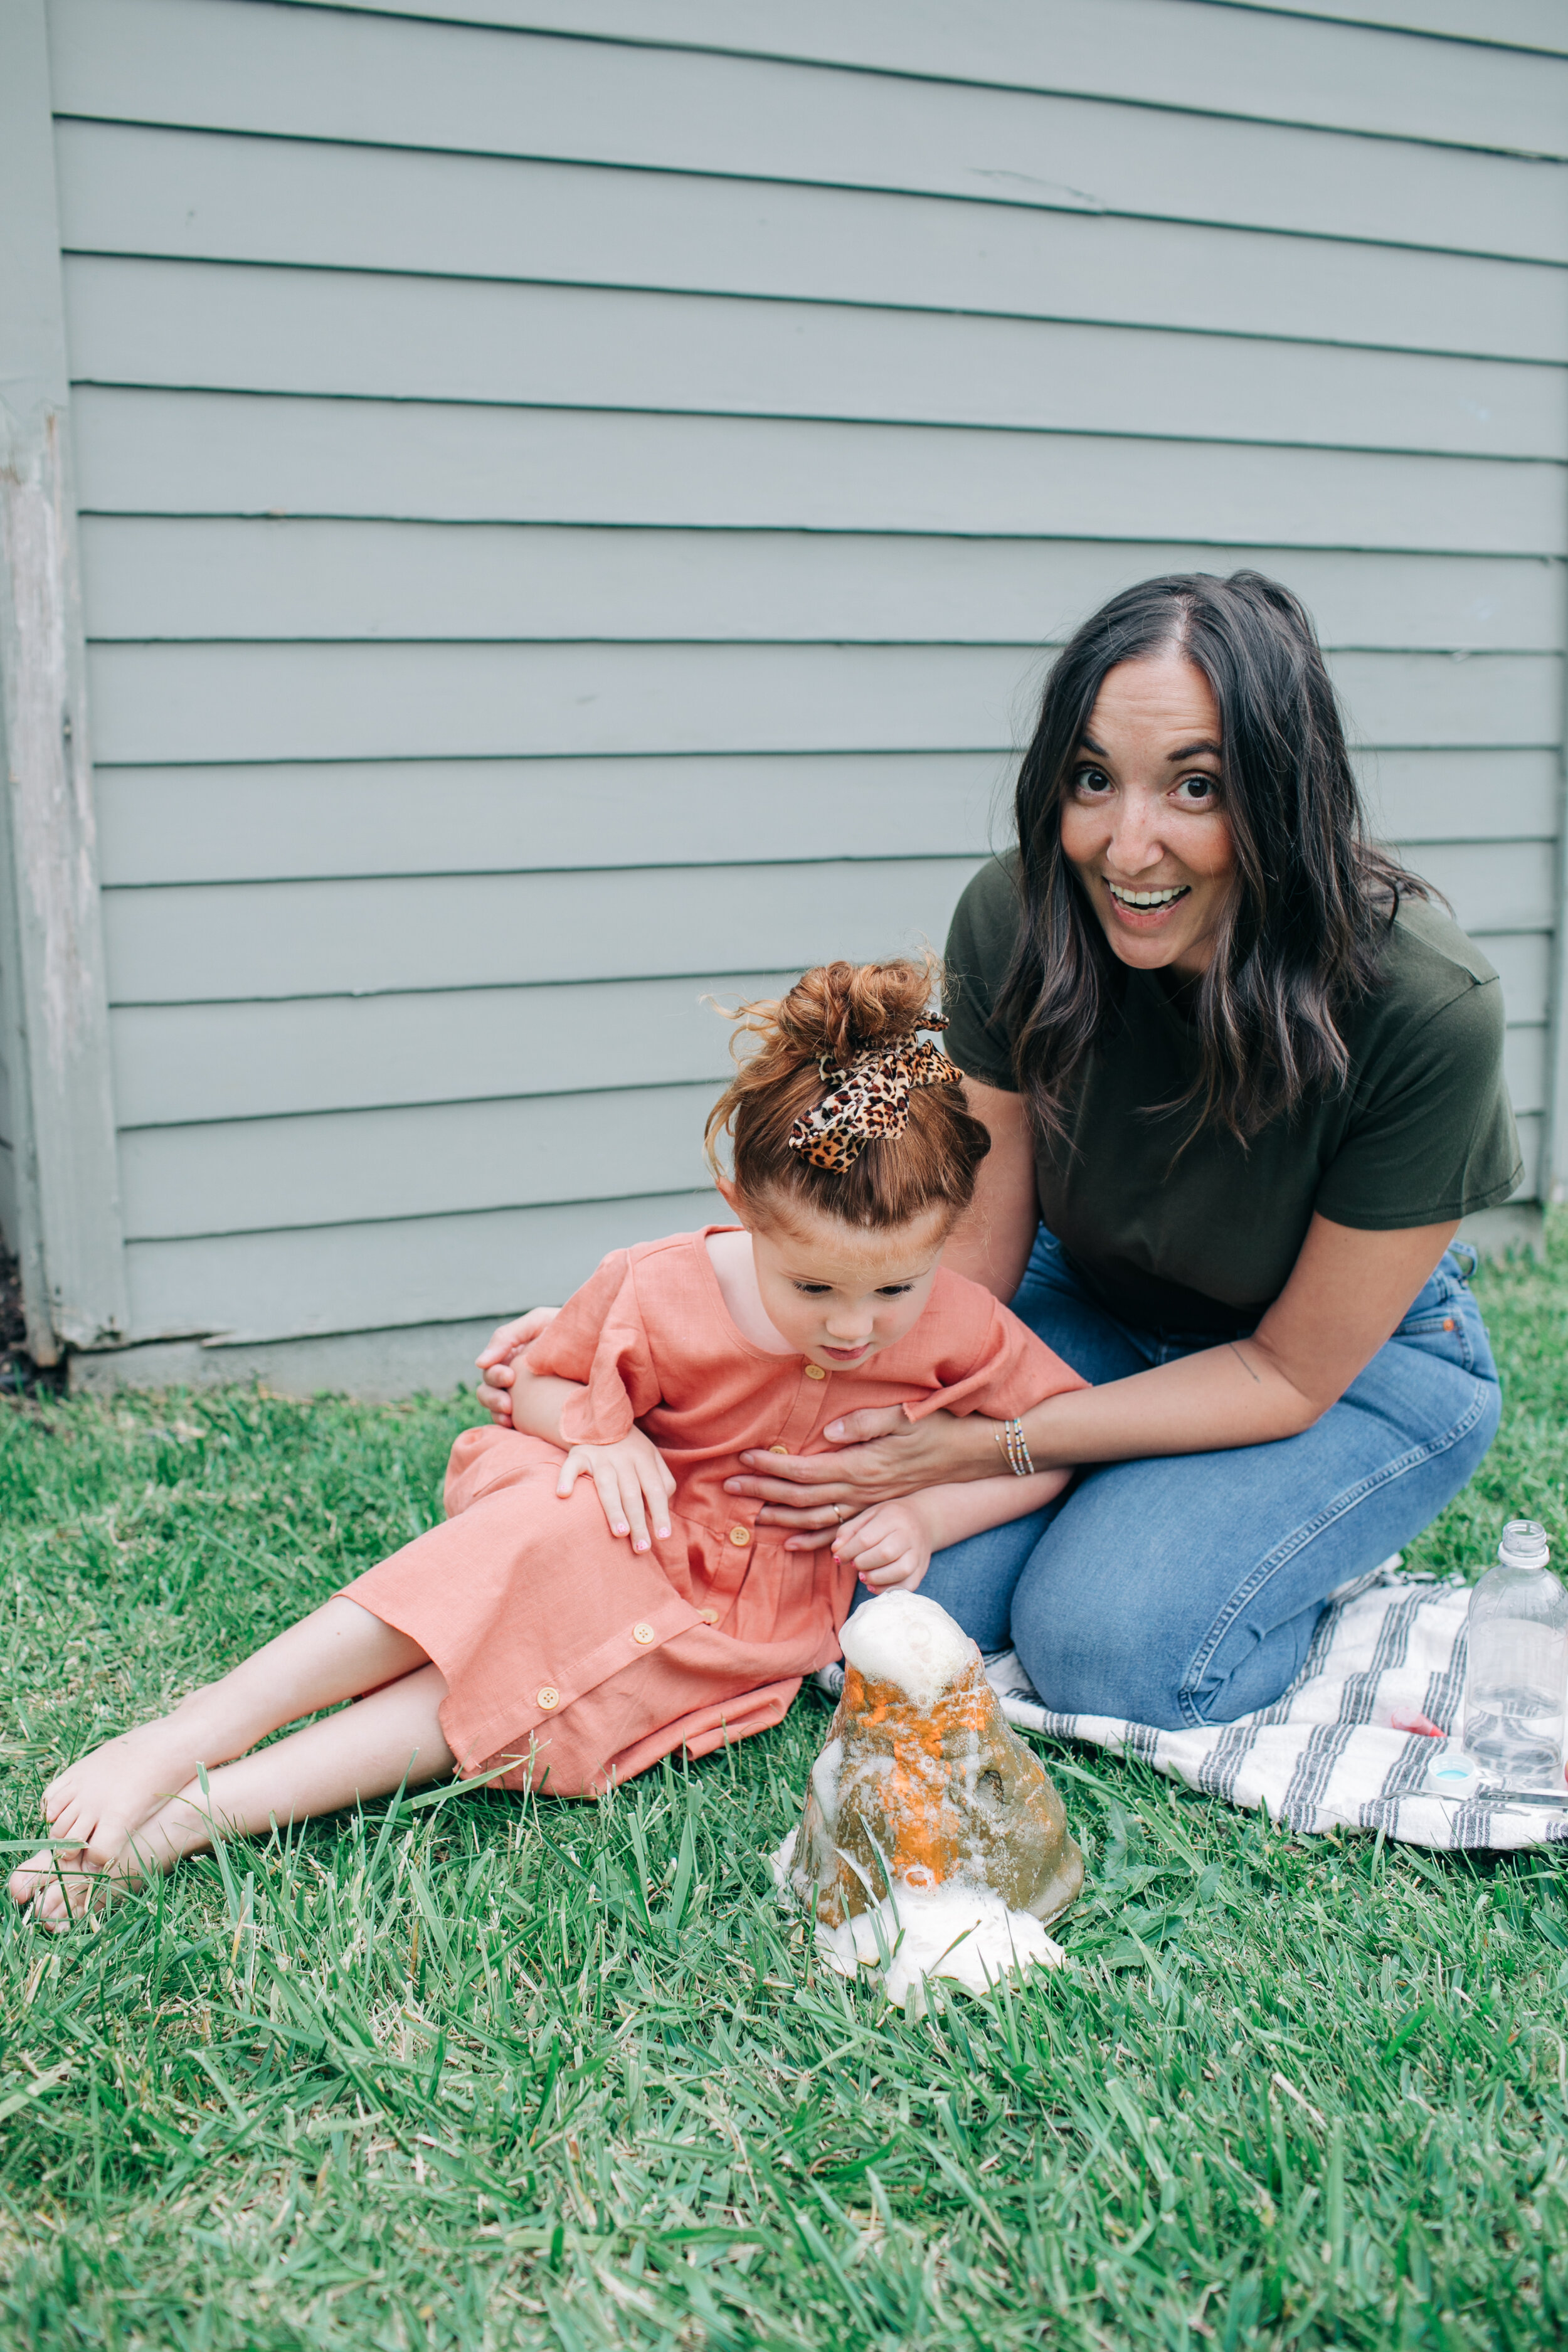
Mila is like LET’S SET THIS OFF!
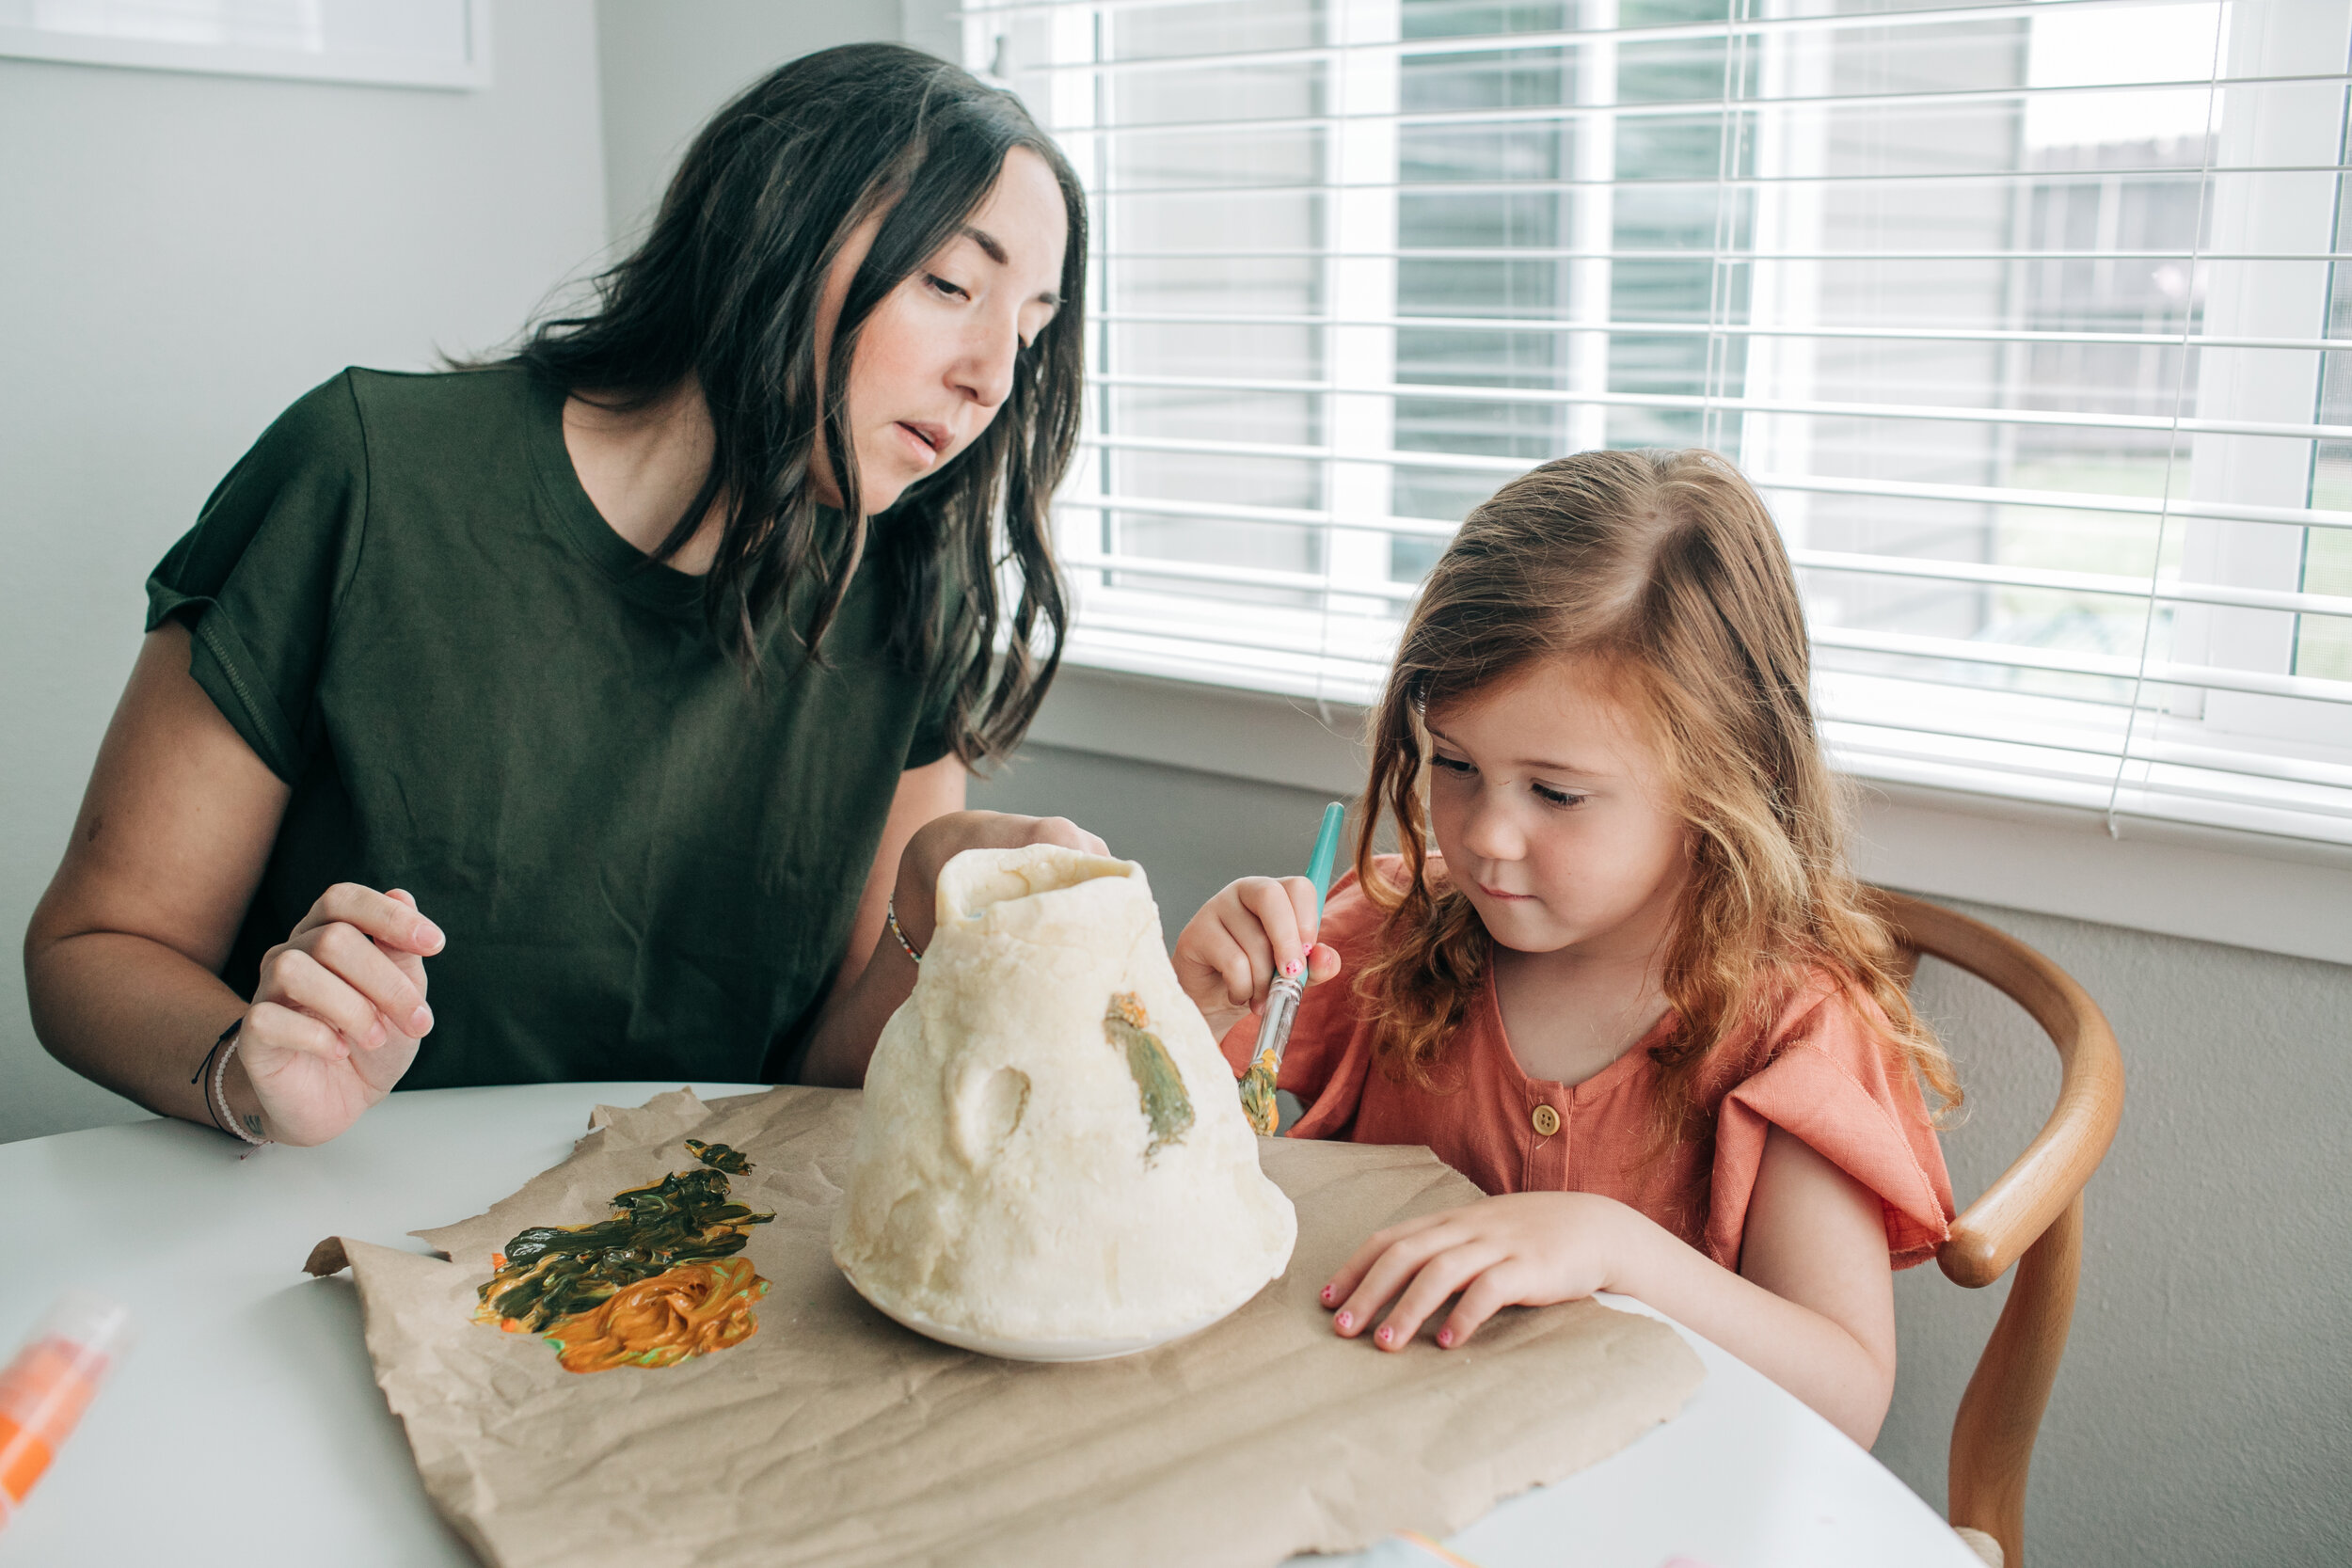
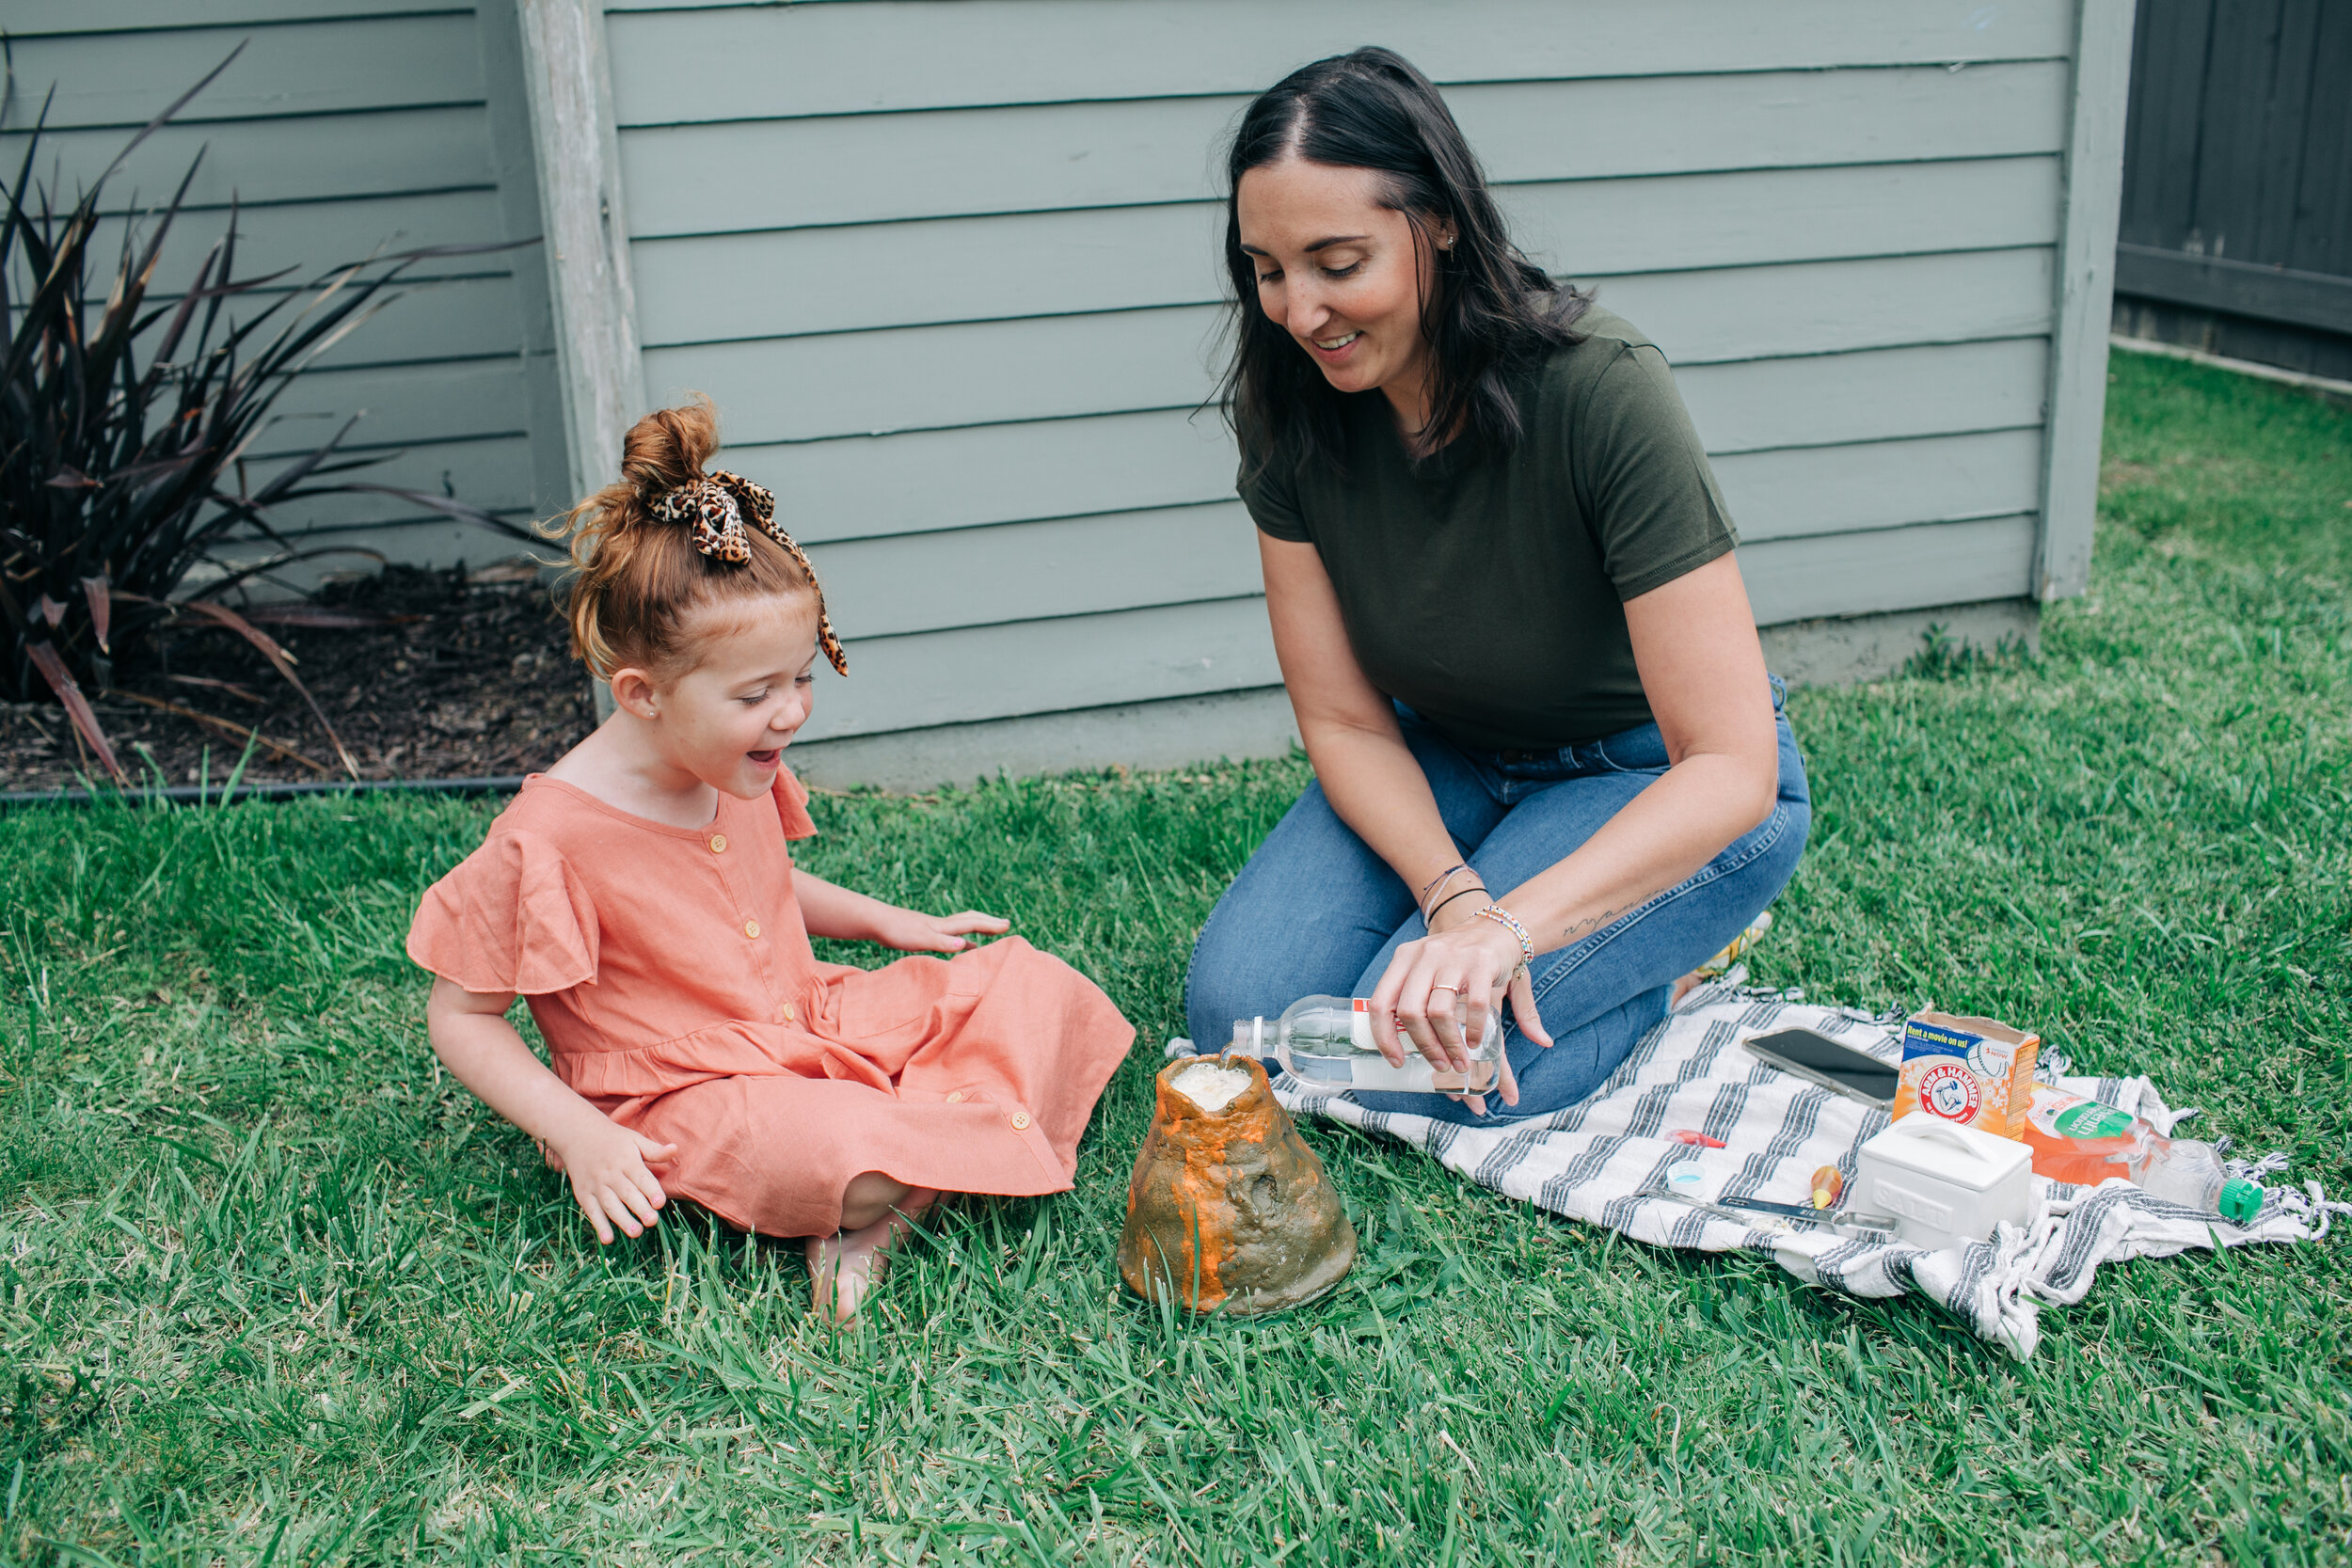
After it was fully dry and hard we painted it “volcano” colors. Orange, brown, black, and a little green gave us the coolest looking volcano! Once our volcanos paint dried then it was time to SET IT OFF! We both were REALLY excited. I’ve been talking up this activity for a while with Mila. I, myself was excited because I had never done this before. It was a first time experience all around and so coo! Find out how we made it erupt below …


First, find a good place outside. You can do this inside as well, just lay down some towels because it will get messy! Start by adding 2 tablespoons of baking soda.

Then add 1/2 tablespoon salt.

To make your lava colorful add a few drops of food color. We chose a bit of red and yellow!

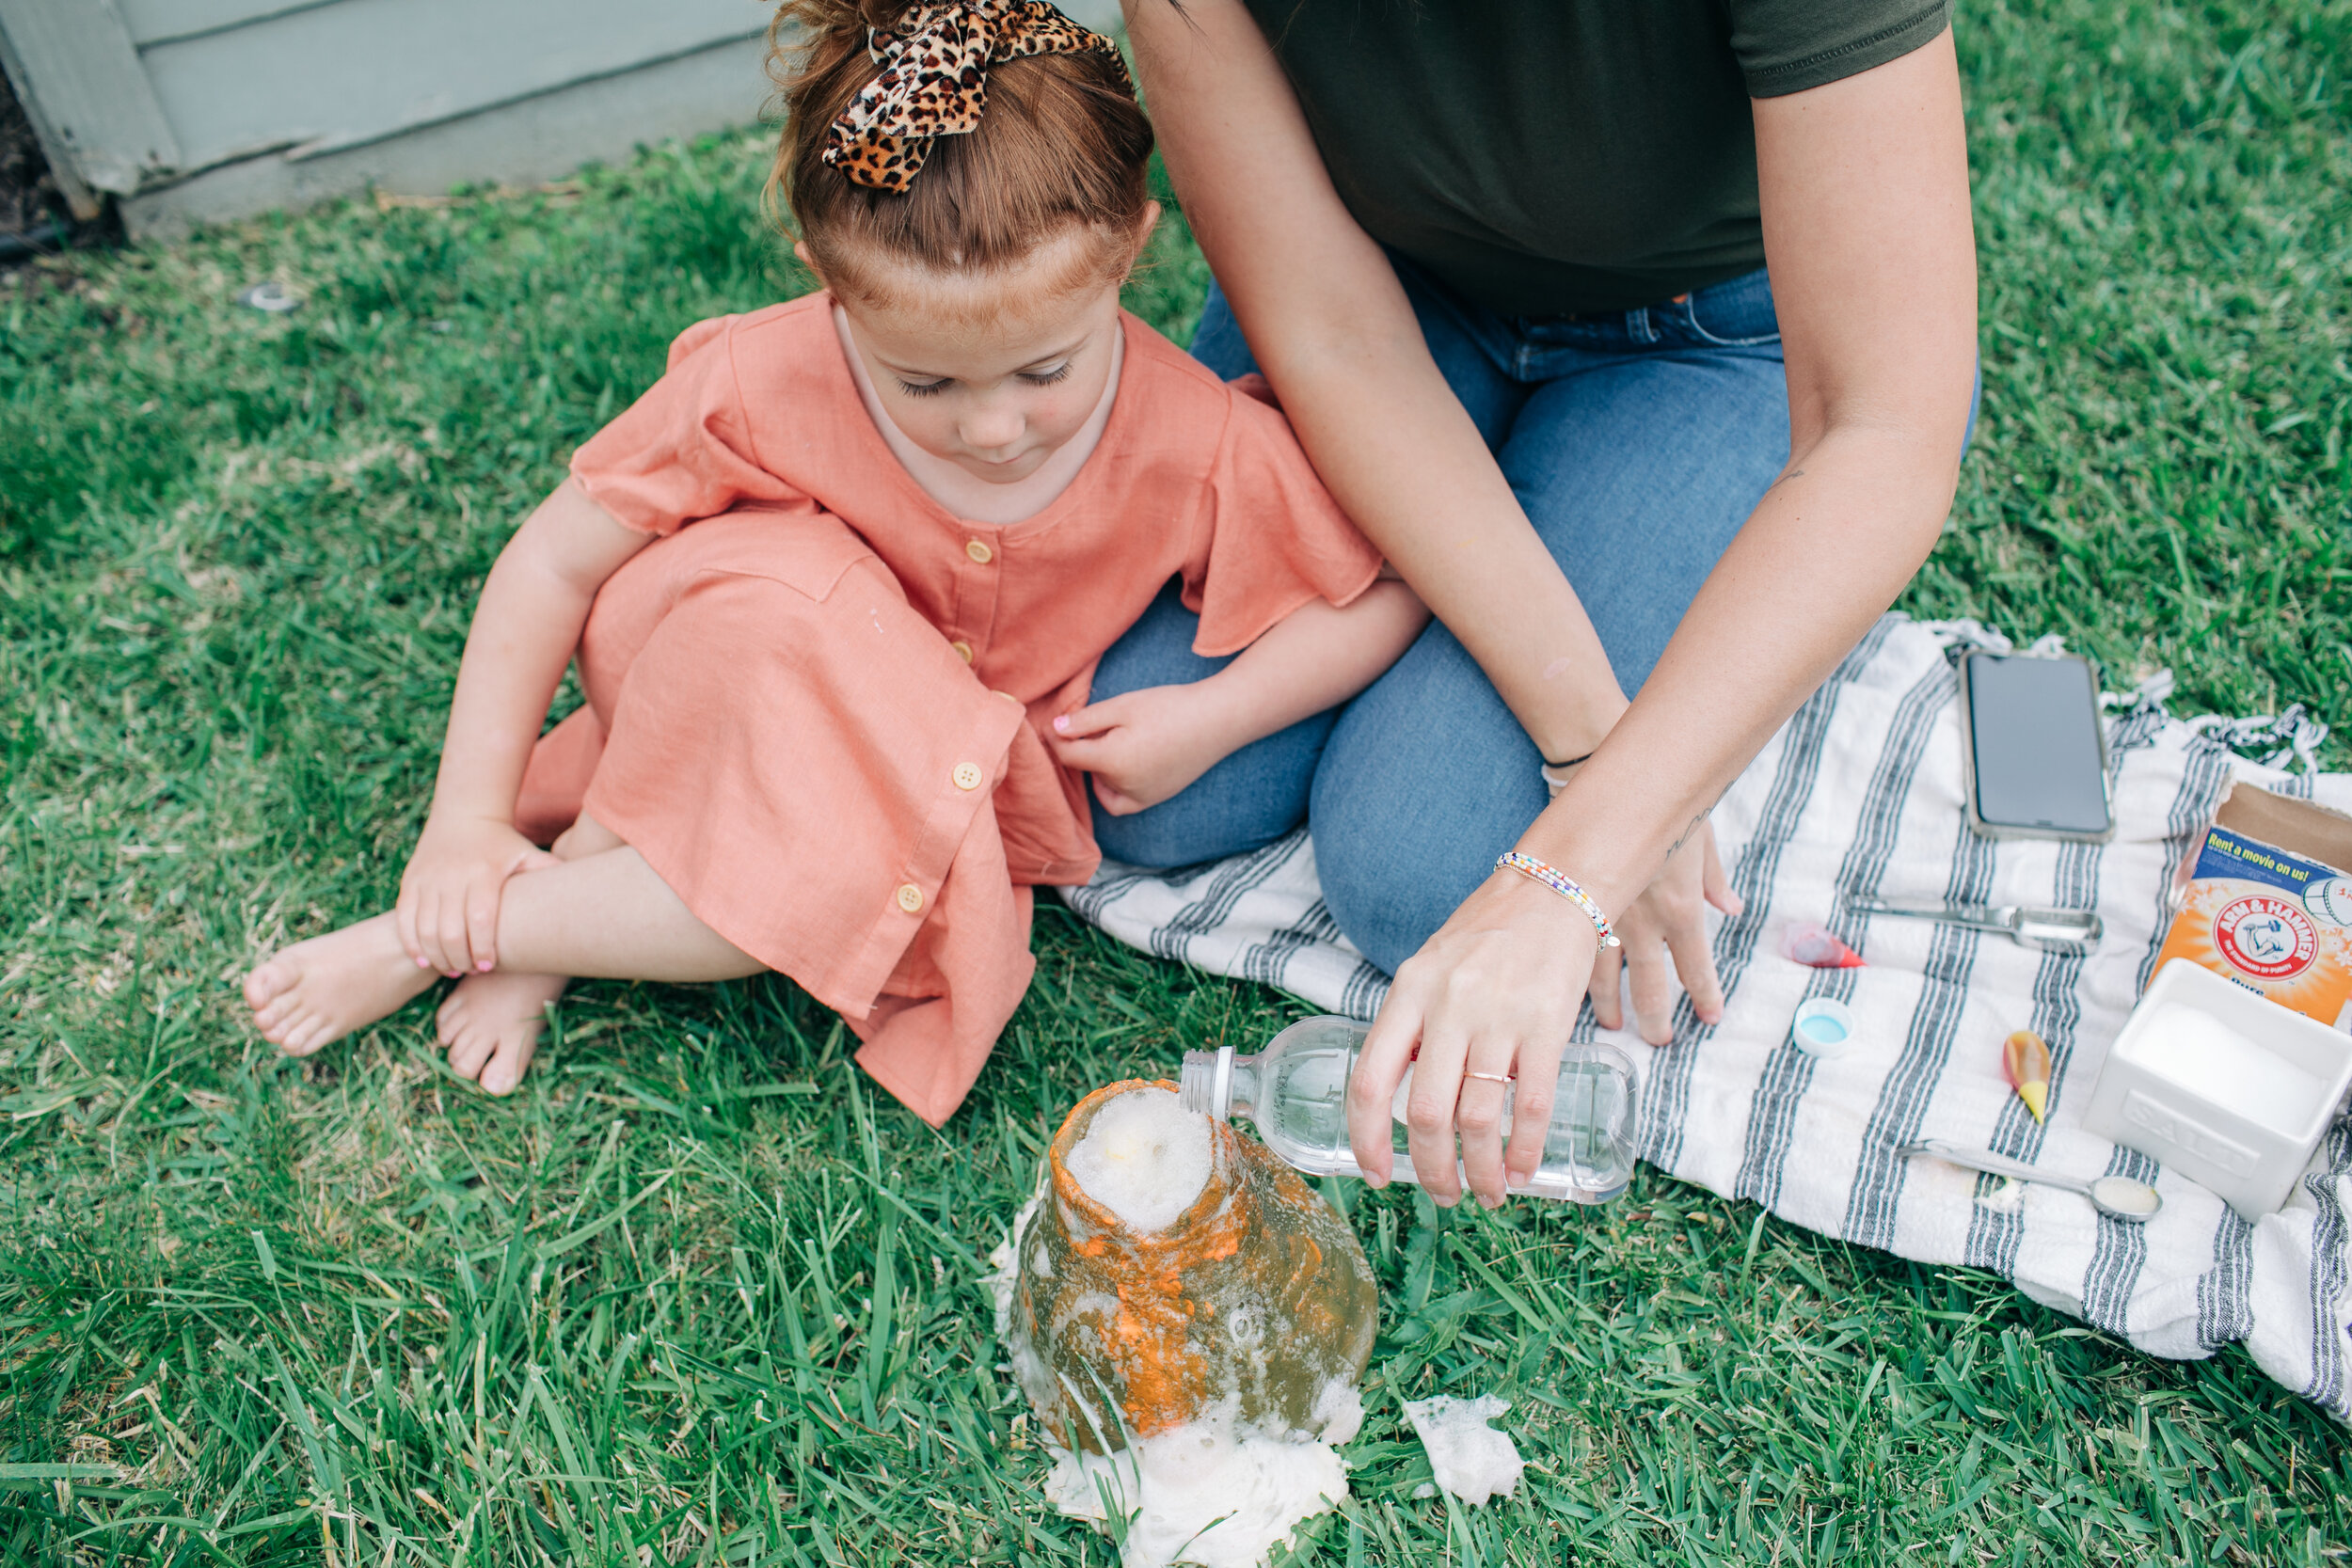
Next add two small squirts of dish soap! This will make your lava nice and bubbly! Then give your concoction a quick stir!
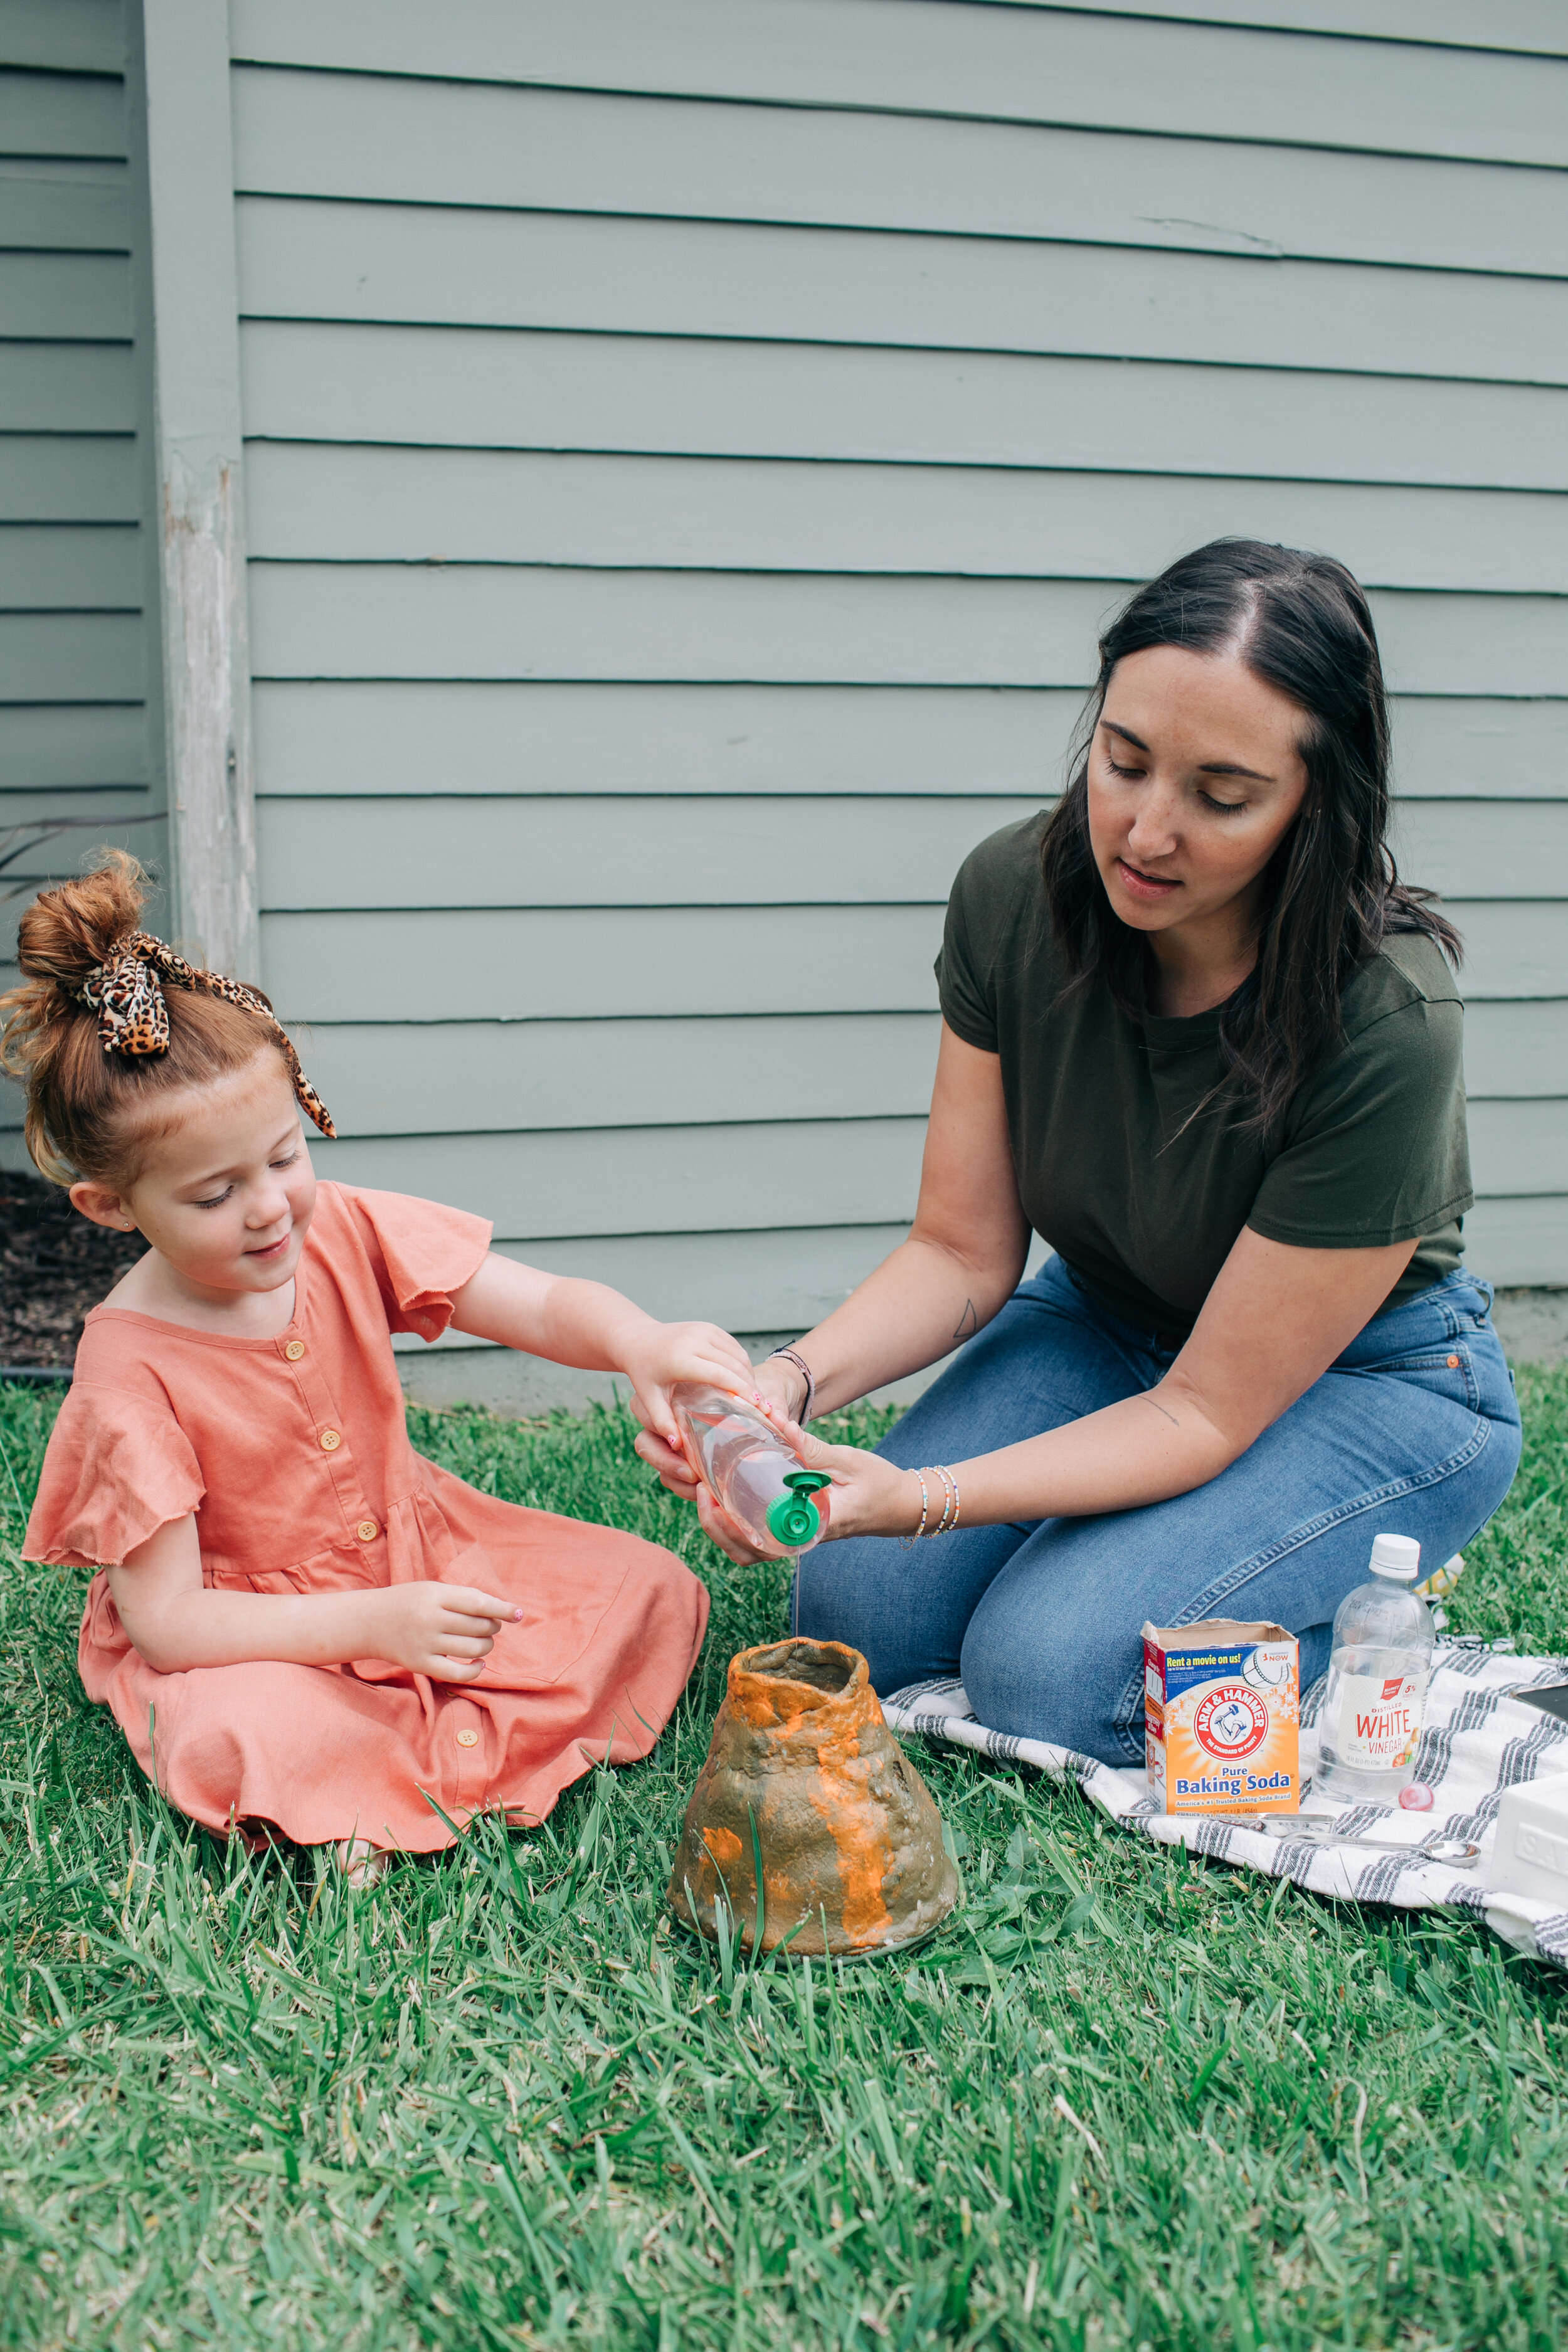
Now, for the most important ingredient of all, add in your vinegar! Once you pour this in your volcano will begin to erupt immediately so be ready! The more vinegar you pour in the more lava will flow. We set off our volcano twice in one day and ended up using this whole bottle here!


This was truly so fun and Mila has been begging to do it again! Next time we are taking some small toys out to play in the lava. We hope you all are doing well and staying safe at home!