
Create Your Own Crystals - Keeping Busy At Home


We are just finishing up our NINTH week of staying at home! Looking back I am quite shocked it has been that long. The days have for sure blended all up together in a giant mush puddle. Some areas of the puddle are shallow and glitter in the sun (those are the good days), some areas of the puddle are dark and dirty with debris (those are the bad days). All in all, a puddle was always meant to be jumped into and splashed around in for fun, so here we are! Heading into week ten and making the most of it, squeezing out fun where ever we can!
This week Mila and I made our own crystals! I had seen this done on Pinterest and it made me so excited. I love activities like this. It reminds me of a science project I did in the 5th grade where I made stalagmites + stalactites in jars. I’ve never forgotten the project and I remember teaching my class an easy way to remember the difference between the two. A stalactite forms on the ceiling so they have to hold on ‘tight’. A a stalagmite forms from the floor up so they are ‘mighty’. I thought I was so smart. Anyways, I was PUMPED to try this activity. When I showed Mila she was less than thrilled and said “I’ll play with the crystals when they are done.”
To be honest this is an older kid activity and it does take 24 hours for the crystals to form. For a four year old that takes way too long! It was fun though leaving them on the counter and watching them grow larger every hour. Mila did pop in to check things out, but I did most of the “oooo-ing and awww-ing.”
Find the how to below and let me know if you make these! I found Borax and the jars at Target and was able to order them through Drive-Up. The rest of the items I had on hand.
Create Your Own Crystals
What You Need; Boiling Water, Heat Safe Glass Jars, Borax, Pipe Cleaners, String, Sticks. *You’ll need 4 tablespoons of Borax for every 1 cup of water. Be sure to measure how much water you’ll need to fill up each jar beforehand! This way you know how much Borax to add.

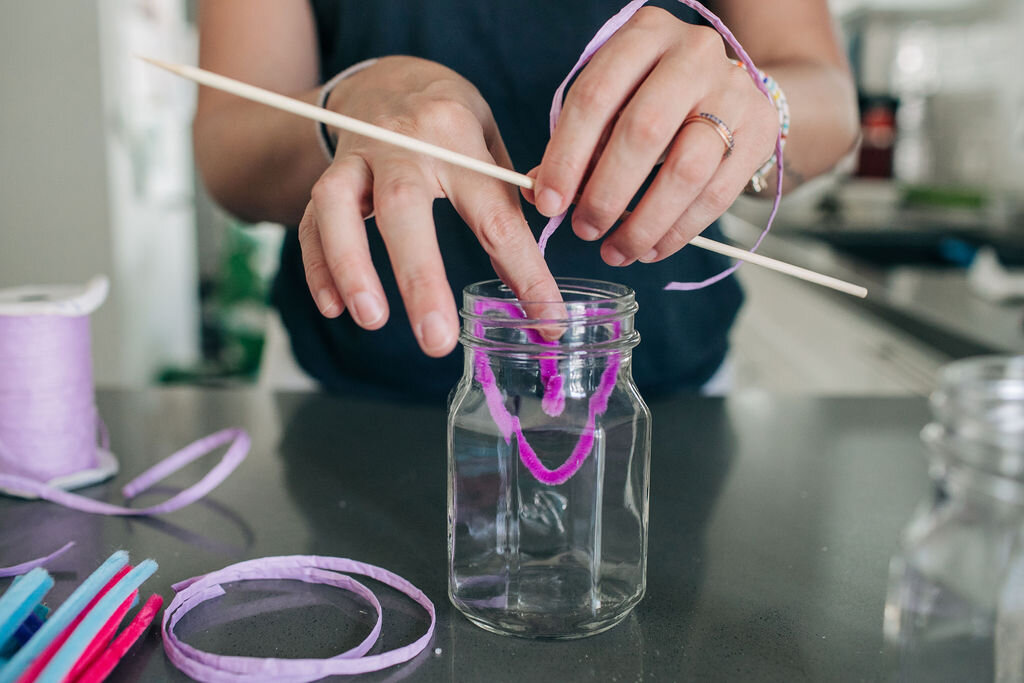
-Start by forming your pipe cleaners into shapes. You can also just cut them down and keep them straight too. The crystals form onto the pipe cleaner. It is also fun to use the brightest pipe cleaners you can since the color will show through the crystals. Be sure to not make the shapes too big, you don’t want them to touch the sides or bottom of the jars!


-Next, use string to tie your pipe cleaner to a stick. We used kabob sticks, but you can use popsicle sticks too. Or even a butter knife! You just need something long enough to rest on the top of the jar.
-Once you have your strings on, drop your pipe cleaner into the jar and rest the stick on the top of the jar. This step is necessary as it helps you fish our your crystals once they are done forming!
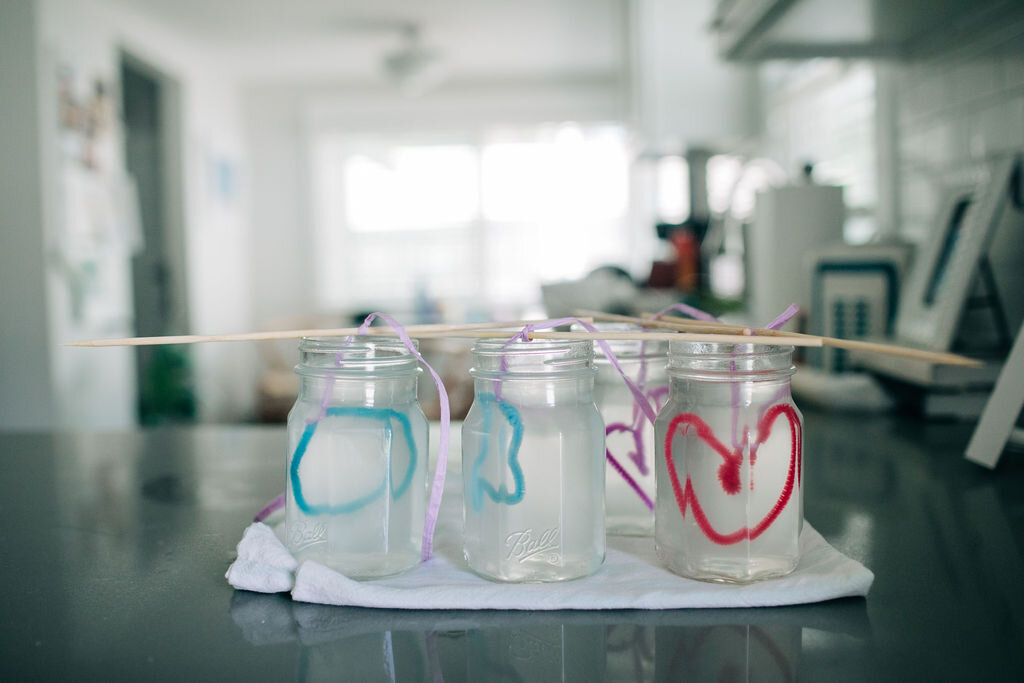
-Helpful Tip * Place all your jars onto a dish towel and move them to a place where they can hang out for the next 24 hours! Be sure to choose a spot where you can easily keep an eye on them so you can see the crystal forming as the time goes by. Do this so after you pour in the hot Borax liquid so you don’t have to try and move the super hot jars!


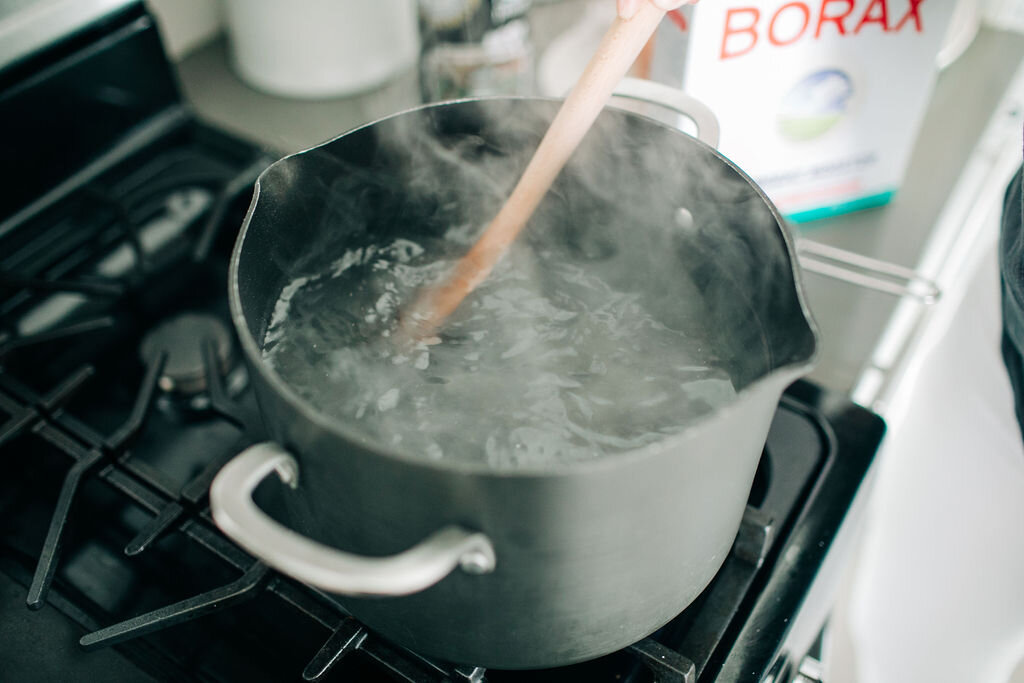
-In a large pot bring your water to a boil.
-Once your water is boiling, add in your Borax. *Remember! You need 4 tablespoons of Borax for every 1 cup of water. You need to fill the jars to the top to cover the entire pipe cleaner. So measure how much water you need BEFORE you boiling it. Based off how many cups you’ll need, measure our how much Borax you’ll need. Do this BEFORE you start boiling your water.
-Once your Borax is in the boiling water reduce the heat and stir until the Borax is fully dissolved. A good trick here is your water will look cloudy at first. Once it appears clear it is ready to be poured into the jars! Take a look at the photos below to get an idea.


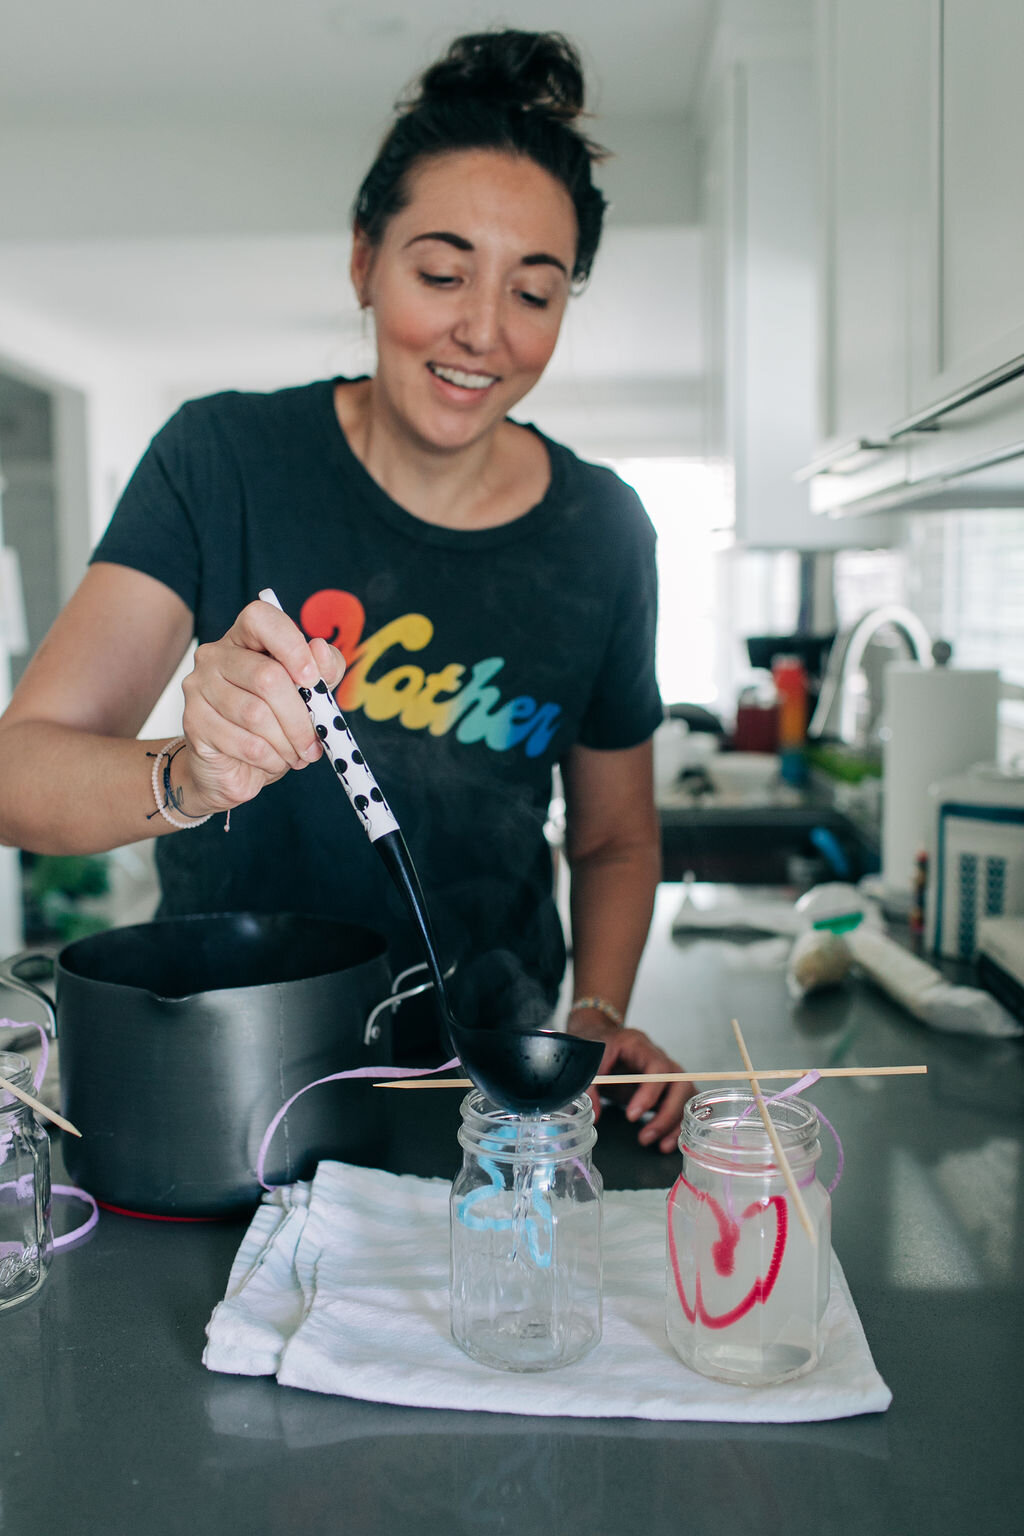
-Now, carefully ladle the hot Borax mixture into each jar. Filling them all the way up so there are no parts of the pipe cleaner sticking up out of the water. Definitely use a ladle here so you don’t spill to much liquid.
-Now, let them sit for 24 hours! Within a couple hours you’ll see crystals start to form! Keep checking on them as the crystals grow more and more as the time goes on.
-Once they’ve hit their 24 hour mark they are ready! Pour out the liquid and gently remove the pipe cleaner. It should be covered in different sized crystals!
-We tied fresh string to ours and hung them in our window :)
-For cleanup I washed the pot with soap and water. Once you remove the crystalized pipe cleaners from the jars there will be crystals that have formed on the bottom of the jars. Just let those soak for a bit in hot water and then use a butter knife to gently tap the remaining crystals free. Then I ran the ladle and jars through the dishwasher.


Again, this was probably my favorite activity yet! Mila enjoyed the big reveal. Let me know if your family makes some!
Have Fun. Stay Safe!